
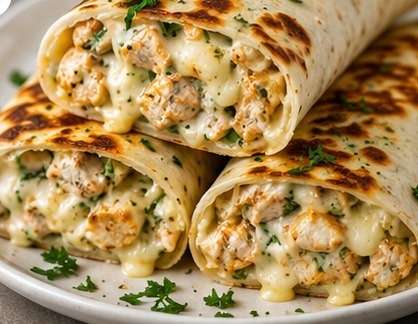
These Low-Carb Garlic Chicken Wraps turn a handful of familiar ingredients into a warm, satisfying meal with crisp edges and a generous chicken filling.
Small pieces of chicken are seasoned and browned before being combined with roasted garlic butter, cream cheese, Parmesan, fresh parsley, and a touch of lemon. Mozzarella is added while assembling the wraps, allowing it to melt around the chicken instead of disappearing into the creamy mixture.
Each tortilla is rolled firmly and toasted in a skillet until the outside develops scattered brown patches. Inside, the chicken remains distinct while the two cheeses create a rich filling that holds together when the wrap is sliced.
Serve the wraps for lunch, dinner, or meal preparation with a salad, roasted vegetables, salsa, or a cool yogurt dip.
Ingredients You’ll Need
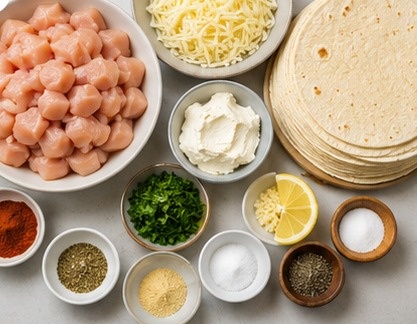
Chicken
Boneless chicken breast is convenient because it cooks quickly and can be cut into neat pieces. Boneless chicken thighs may be substituted for a richer result.
Low-Carb Tortillas
Use flexible medium tortillas that fit your dietary needs. The final carbohydrate amount will depend on the specific tortilla brand.
Fresh Garlic
Four cloves give the filling a noticeable garlic flavor without relying entirely on garlic powder.
Cream Cheese
Cream cheese helps bind the chopped chicken and prevents loose pieces from falling out when the wraps are cut.
Greek Yogurt
A small amount softens the cream cheese and adds a gentle tang without making the mixture watery.
Mozzarella
Low-moisture mozzarella melts neatly and gives the center a stretchy texture.
Parmesan
Parmesan adds stronger cheese flavor, so the filling does not depend only on mozzarella.
Lemon and Parsley
Lemon brightens the rich filling, while parsley adds freshness and small flecks of color.
Ingredients
For the Chicken
- 1¼ pounds boneless, skinless chicken breast
- 1 tablespoon olive oil
- 1 teaspoon smoked paprika
- ¾ teaspoon garlic powder
- ½ teaspoon onion powder
- ½ teaspoon dried oregano
- ¾ teaspoon salt
- ¼ teaspoon black pepper
For the Garlic-Cheese Mixture
- 1 tablespoon unsalted butter
- 4 garlic cloves, finely minced
- 3 ounces cream cheese, softened
- 2 tablespoons plain Greek yogurt
- ⅓ cup finely grated Parmesan cheese
- 2 tablespoons chopped fresh parsley
- 1 teaspoon finely grated lemon zest
- 1 teaspoon fresh lemon juice
- ¼ teaspoon black pepper
For Assembling the Wraps
- 6 medium low-carb tortillas
- 1¼ cups shredded low-moisture mozzarella
- 1 teaspoon olive oil or butter, for the skillet
Optional Additions
- Crushed red pepper
- Finely chopped green onions
- Cooked spinach
- Chopped roasted peppers
- Diced jalapeño
- Sugar-free hot sauce
How to Make Low-Carb Garlic Chicken Wraps
Step 1: Prepare the Chicken
Pat the chicken dry and cut it into pieces measuring approximately ¾ inch.
Place the chicken in a mixing bowl. Add olive oil, smoked paprika, garlic powder, onion powder, oregano, salt, and black pepper.
Toss until the seasoning is distributed evenly and no dry patches remain.
Try to keep the pieces close to the same size so they finish cooking at approximately the same time.
Step 2: Brown the Chicken
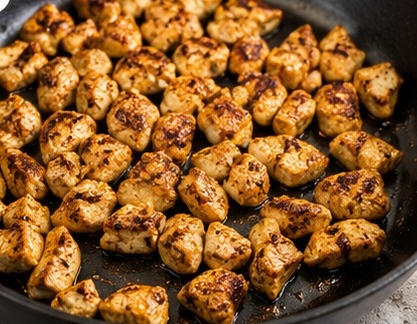
Alt text: Seasoned chicken pieces browning in a skillet
Place a large skillet over medium-high heat.
When the skillet is hot, add the chicken and spread it into one layer. Allow the pieces to cook briefly before stirring so the first side can brown.
Continue cooking and turning the pieces until the centers are fully cooked.
Transfer the chicken to a clean plate and allow it to cool for several minutes. Chicken should reach an internal temperature of 165°F or 74°C, measured with a food thermometer.
Step 3: Soften the Garlic in Butter
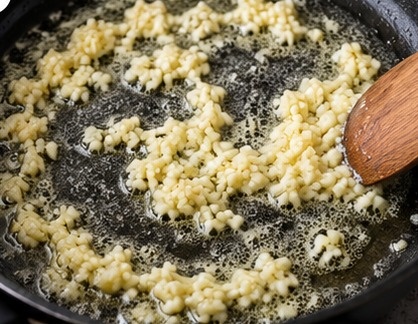
Lower the skillet heat and add the butter.
Once the butter melts, stir in the minced garlic. Cook for approximately 30 seconds, moving it constantly around the skillet.
Remove the pan from the heat as soon as the garlic smells fragrant. It should remain pale rather than becoming deeply browned.
Pour the garlic butter into a mixing bowl.
Step 4: Build the Filling
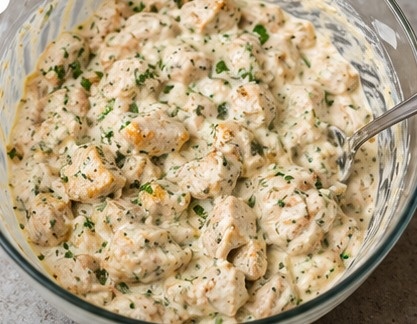
Add the softened cream cheese to the bowl containing the garlic butter.
Stir in the Greek yogurt, Parmesan, parsley, lemon zest, lemon juice, and black pepper.
Mix until the base is smooth and evenly seasoned.
Add the cooked chicken and fold it through the mixture. The finished filling should coat the chicken lightly while the individual pieces remain visible.
Avoid adding extra liquid. The mixture will soften further when heated inside the tortillas.
Step 5: Fill and Roll
Warm the tortillas for a few seconds so they bend without splitting.
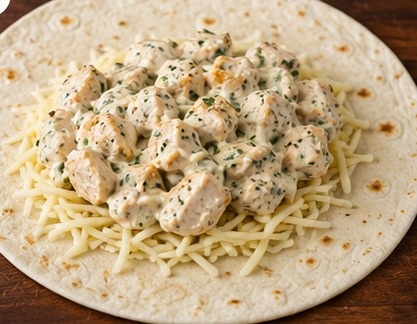
Place one tortilla on a board. Sprinkle a small portion of mozzarella across the lower-middle section.
Add one-sixth of the chicken mixture, leaving a clear border around the edges. Finish with another small layer of mozzarella.
Fold both side edges toward the center. Lift the bottom edge over the filling and continue rolling until the tortilla forms a compact cylinder.
Set the completed wrap with its folded edge facing downward while preparing the remaining tortillas.
Step 6: Toast Until Golden
Clean the skillet and return it to medium or medium-low heat.
Lightly coat the surface with olive oil or butter.
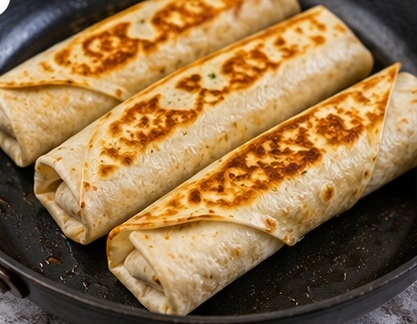
Place the wraps in the pan with the folded edge touching the hot surface first. Cook until that side becomes golden and holds its shape.
Rotate the wraps carefully and brown the remaining sides. Use moderate heat so the tortillas have time to toast while the mozzarella melts inside.
Cook in batches rather than crowding the skillet.
Step 7: Rest Before Cutting
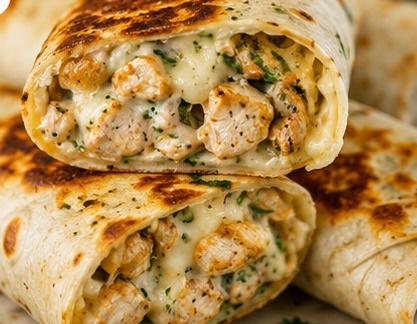
Transfer the finished wraps to a board and leave them undisturbed for two to three minutes.
Cut each wrap diagonally with a sharp knife.
The brief rest allows the hot cheese to settle around the chicken, helping the sliced wraps hold their shape.
Sprinkle with parsley and serve while warm.
Tips for Better Wraps
Dry the Chicken Before Seasoning
Removing excess surface moisture helps the chicken make better contact with the hot skillet.
Cool the Chicken Slightly
Very hot chicken can soften the cream cheese too quickly. Let it sit for several minutes before combining the filling.
Place Mozzarella in Layers
Adding mozzarella below and above the chicken distributes the melted cheese more evenly throughout each wrap.
Keep the Filling Away from the Edges
Leaving a border makes the tortillas easier to fold and reduces filling loss during toasting.
Control the Heat
Very high heat can darken the tortillas before the center becomes warm. Medium or medium-low heat gives a more even result.
Rest Before Slicing
The wraps are easiest to cut after the melted filling has had a moment to settle.
What to Serve With Garlic Chicken Wraps
Pair the wraps with something crisp or acidic to balance the cheese filling:
- Cucumber and tomato salad
- Chopped green salad
- Roasted broccoli
- Sautéed zucchini
- Cauliflower rice
- Fresh tomato salsa
- Pickled jalapeños
- Lemon-garlic yogurt dip
- Sugar-free marinara
- Avocado salad
Easy Variations
Spicy Garlic Chicken Wraps
Add crushed red pepper, chopped jalapeño, or hot sauce to the cream-cheese mixture.
Spinach and Chicken Wraps
Cook chopped spinach until wilted, then squeeze out its moisture before adding it to the filling.
Roasted Pepper Wraps
Fold finely chopped roasted red pepper into the chicken mixture for sweetness and color.
Garlic Chicken Quesadillas
Spread the filling over half of each tortilla, add mozzarella, fold it closed, and toast it flat.
Bacon Garlic Chicken Wraps
Add a small quantity of crisp, finely chopped bacon to the filling.
Lettuce-Wrap Version
Skip the tortillas and serve the cooled garlic chicken filling in sturdy lettuce leaves. Mozzarella can be reduced or omitted for this variation.
Making the Recipe Lower in Carbohydrates
Most of the carbohydrates in this recipe come from the tortillas.
Choose a tortilla with nutrition information that matches your personal dietary goals. Packaged products vary considerably, even when they are labeled low carb.
Keep optional sauces unsweetened and serve the wraps with vegetables, salad, or cauliflower rice rather than regular rice or potatoes.
Make-Ahead Instructions
The chicken may be seasoned and cooked in advance.
The garlic-cheese base can also be mixed separately and refrigerated. Combine it with the chicken before filling the tortillas.
For the best exterior texture, roll and toast the wraps close to serving time.
When preparing them earlier in the day, cover the assembled wraps and refrigerate them with their folded edges facing downward.
How to Store
Cool leftover wraps and place them in a sealed container.
Refrigerate them promptly and use them within three to four days. Official food-safety guidance also recommends refrigerating cooked food within two hours.
If stacking the wraps, place parchment paper between the layers.
How to Reheat
Skillet
Place the wraps in a dry skillet over medium-low heat. Rotate them occasionally until the outside becomes crisp and the center is hot.
Air Fryer
Arrange the wraps in one layer and heat until the tortillas regain their texture and the filling is warmed through.
Oven
Place the wraps on a baking sheet and heat until the centers are hot.
For food safety, reheated leftovers should reach 165°F or 74°C.
A microwave can be used, but it will produce a softer exterior.
Can You Freeze the Wraps?
Yes. Cool the toasted wraps completely before freezing.
Wrap each one separately and place them inside a freezer-safe container or bag.
Freeze for up to two months for convenient meal preparation.
Thaw overnight in the refrigerator, then reheat in a skillet, air fryer, or oven.
Freezing the cooked wraps is preferable to freezing raw assembled wraps because the tortillas may absorb moisture from the uncooked filling.
Common Mistakes to Avoid
Cutting the Chicken Too Large
Large pieces make the tortillas harder to roll and can create uneven pockets in the filling.
Burning the Garlic
Garlic continues cooking quickly in hot butter. Remove it from the heat while it is still pale.
Adding Too Much Yogurt
Only a small amount is needed. Excess yogurt can make the filling difficult to contain.
Filling Cold, Stiff Tortillas
Warm the tortillas briefly so they can fold without cracking.
Packing the Wraps Too Tightly in the Pan
Leave enough room to turn each wrap without tearing it.
Cutting Immediately
Freshly melted cheese can escape from the ends. Allow the wraps to rest first.
Frequently Asked Questions
Can I use chicken thighs?
Yes. Use boneless, skinless thighs and cut them into similarly sized pieces. They may need slightly more cooking time than chicken breast.
Can cooked chicken be used?
Yes. Leftover cooked chicken or rotisserie chicken can save time. Reduce the added salt until you have tasted the filling.
Can I leave out the Greek yogurt?
Yes. Replace it with one additional tablespoon of softened cream cheese or simply omit it for a firmer filling.
Which cheese can replace mozzarella?
Monterey Jack, provolone, mild cheddar, or a mixture of melting cheeses can be used.
Why did my wraps split?
The tortilla may have been cold, dry, overfilled, or rolled too firmly. Warm it first and leave space around the filling.
Why did the filling come out while cooking?
The wrap may contain too much filling, or its folded edge may not have been secured against the skillet at the start of cooking.
Is the recipe very spicy?
No. Smoked paprika adds warmth and color rather than strong heat. Add chili flakes, cayenne, or jalapeño for a spicy version.
Are the wraps suitable for meal preparation?
Yes. Cool them before refrigerating, then reheat them in a skillet or air fryer when ready to eat.
Leave a Reply