
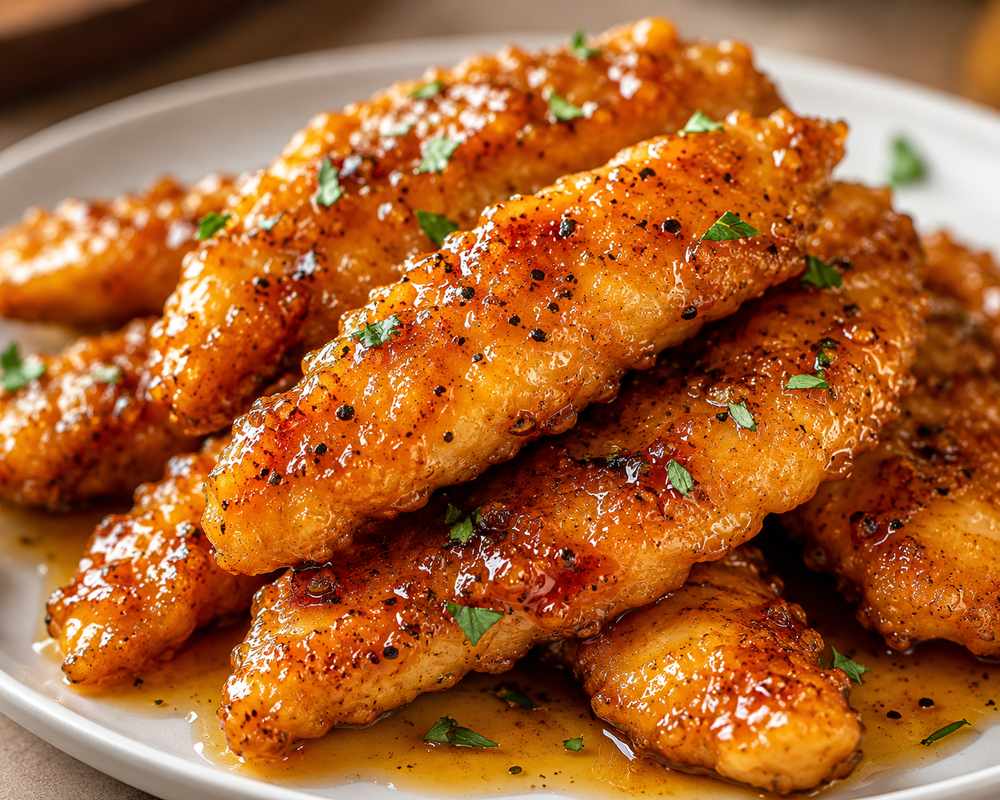
These Golden Honey-Garlic Butter Chicken Strips are crisp around the edges, juicy through the middle, and coated in a glossy sauce that lands somewhere between sweet, savory, buttery, and garlicky. The glaze clings to the chicken without burying it, so you still get a little crunch beneath all that sticky goodness.
The chicken gets a quick yogurt-and-lemon seasoning before being covered in a light flour, rice flour, and cornstarch coating. It is not the thick, craggy breading you might expect from traditional fried chicken. Instead, it creates a thin golden shell that works especially well with a smooth glaze.
The sauce comes together in the same skillet with lightly browned butter, fresh garlic, honey, soy sauce, lemon juice, and a little chicken broth. A small cornstarch slurry gives it that shiny restaurant-style finish without turning it into a heavy gravy.
This is the kind of dinner that looks like takeout but does not leave you wondering why you spent so much money on six pieces of chicken. Serve it over rice, beside mashed potatoes, with roasted vegetables, or straight from the platter while pretending you are only “testing the seasoning.
Ingredients
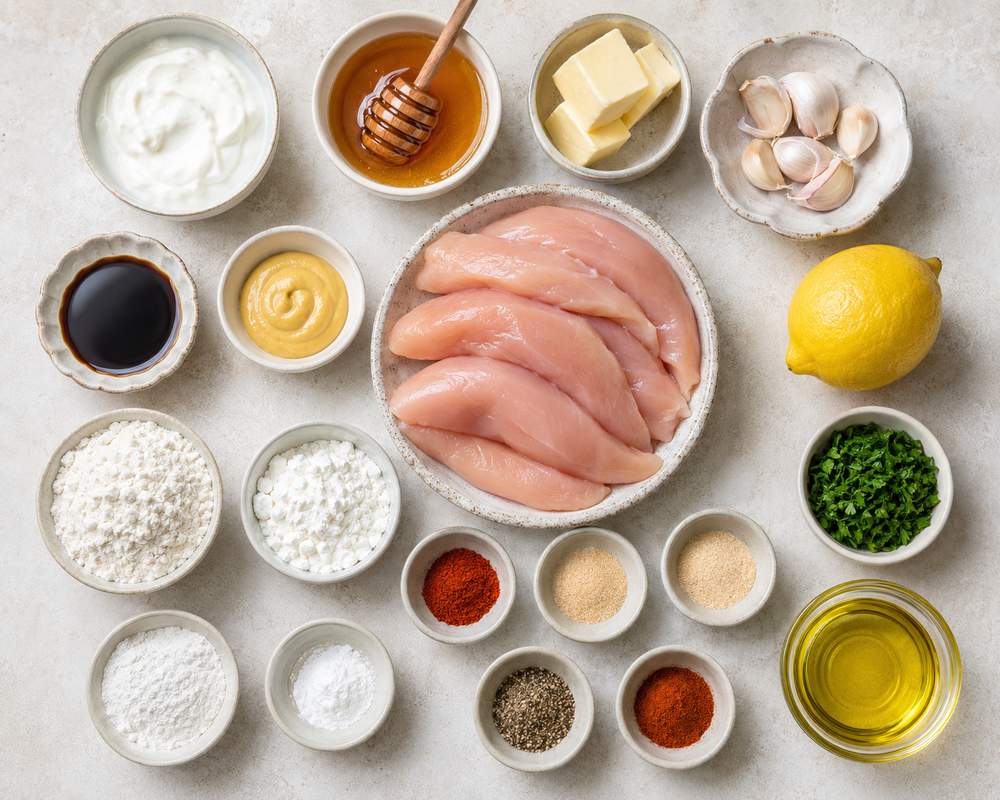
For the Chicken
- 1½ pounds chicken tenderloins
- 3 tablespoons plain unsweetened yogurt
- 1 tablespoon fresh lemon juice
- 1 teaspoon garlic powder
- ¾ teaspoon smoked paprika
- ¾ teaspoon fine salt
- ½ teaspoon onion powder
- ½ teaspoon ground black pepper
- ¼ teaspoon cayenne pepper, optional
For the Light Crispy Coating
- ½ cup all-purpose flour
- ⅓ cup cornstarch
- ¼ cup rice flour
- ½ teaspoon baking powder
- ½ teaspoon garlic powder
- ½ teaspoon smoked paprika
- ½ teaspoon fine salt
- ¼ teaspoon ground black pepper
- Neutral cooking oil, for shallow frying
For the Honey-Garlic Butter Glaze
- 3 tablespoons unsalted butter
- 5 garlic cloves, very finely minced or grated
- ⅓ cup honey
- 1½ tablespoons soy sauce
- 1 tablespoon fresh lemon juice
- ¼ cup low-sodium chicken broth
- 1 teaspoon smooth yellow mustard
- ¼ teaspoon smoked paprika
- ¼ teaspoon red pepper flakes, optional
- Pinch of black pepper
For the Slurry
- 1 teaspoon cornstarch
- 1 tablespoon cold water
For Finishing
- 2 tablespoons finely chopped fresh parsley
- Freshly cracked black pepper
- Lemon wedges, optional
How to Make Honey-Garlic Butter Chicken Strips
Step 1: Prepare the Chicken
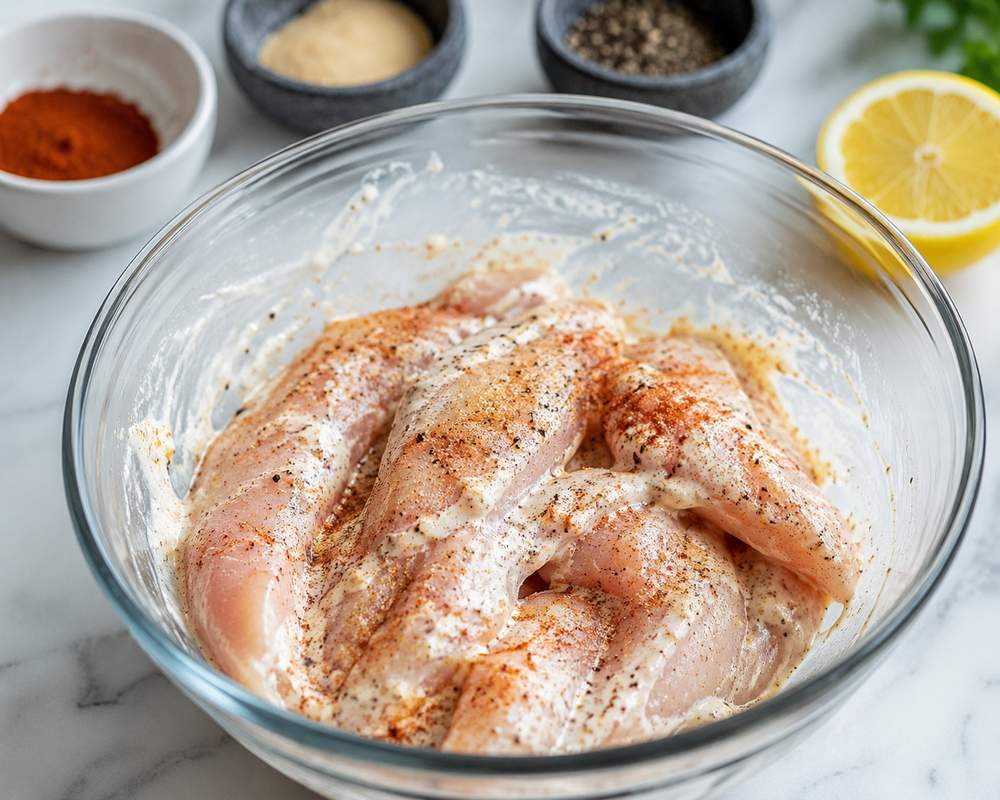
Pat the chicken tenderloins thoroughly dry with paper towels.
This may feel like an insignificant step, but moisture sitting on the chicken dilutes the seasoning and makes the coating harder to attach.
If the thick white tendon is visible, remove it with a small knife. You can also grip the tendon with a paper towel and gently pull while scraping the meat away with the back of a knife.
Place the chicken in a medium bowl.
Add the yogurt, lemon juice, garlic powder, smoked paprika, salt, onion powder, black pepper, and cayenne if using.
Toss until every tender is covered with a thin layer of seasoning.
Let the chicken rest for 20 minutes at room temperature, or cover and refrigerate it for up to 4 hours.
The coating should look light and creamy—not like the chicken is swimming in marinade.
Step 2: Mix the Crispy Coating
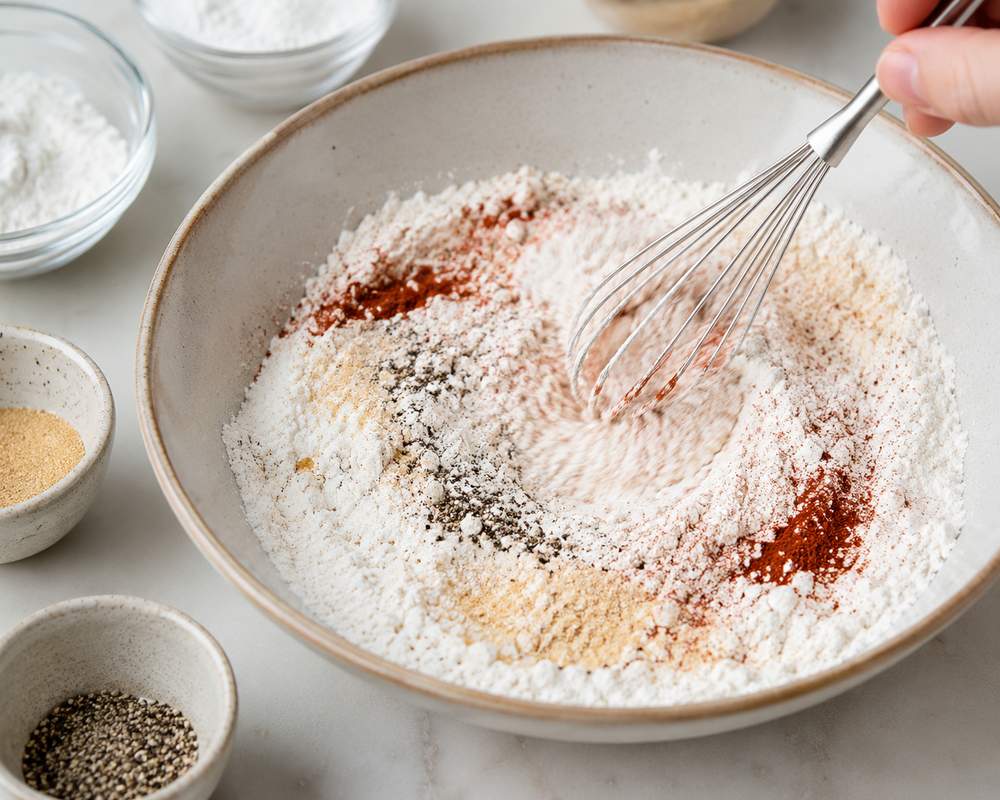
In a wide, shallow bowl, combine:
- All-purpose flour
- Cornstarch
- Rice flour
- Baking powder
- Garlic powder
- Smoked paprika
- Salt
- Black pepper
Stir until the seasonings are evenly distributed.
Each dry ingredient has a job:
- All-purpose flour gives the coating enough structure to stay attached.
- Cornstarch helps create crisp, delicate edges.
- Rice flour keeps the crust light rather than bready.
- Baking powder adds tiny bubbles and a little extra texture.
Step 3: Coat the Chicken
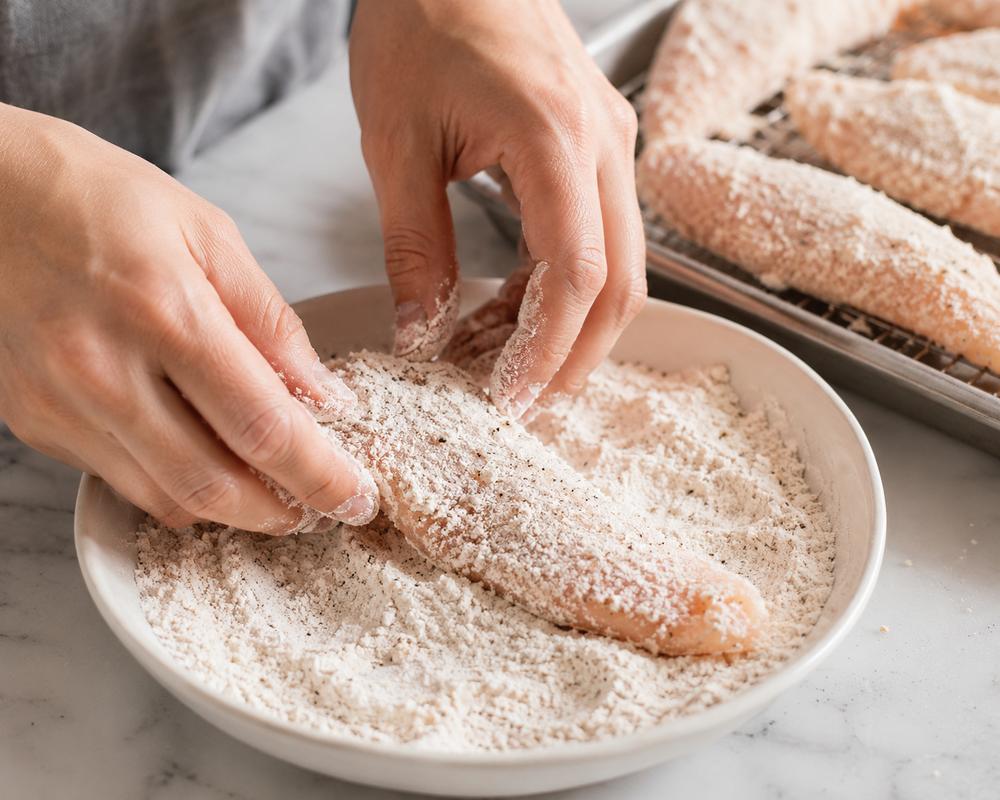
Lift one chicken tender from the marinade and allow the thickest excess to drip back into the bowl.
Do not wipe it clean. The thin layer of yogurt helps the flour mixture stick.
Place the chicken in the coating.
Spoon the flour mixture over the top and press gently over both sides.
Lift the tender and shake off flour that is completely loose.
Place it on a wire rack or parchment-lined tray.
Repeat with the remaining chicken.
Let the coated tenders rest for 8 to 10 minutes.
During this time, the flour absorbs a little moisture from the marinade and becomes slightly tacky. That helps the coating remain on the chicken instead of floating away in the oil like tiny edible confetti.
Step 4: Heat the Oil
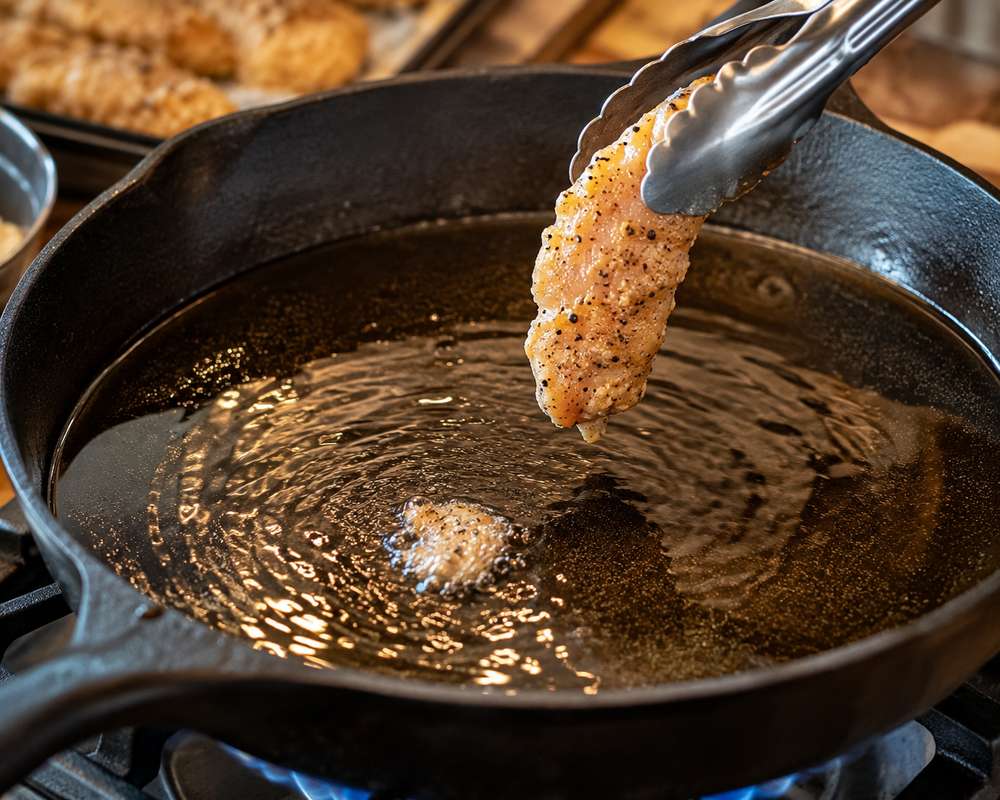
Pour neutral oil into a wide, heavy skillet until it reaches approximately ¼ inch deep.
Heat it over medium to medium-high heat.
The ideal frying temperature is around 350°F or 175°C.
Without a thermometer, drop a small pinch of coating into the oil. It should bubble immediately and rise toward the surface, but it should not turn brown within a few seconds.
Oil that is too cool can make the coating greasy. Oil that is too hot can brown the outside before the chicken is cooked in the middle.
Step 5: Cook the Chicken
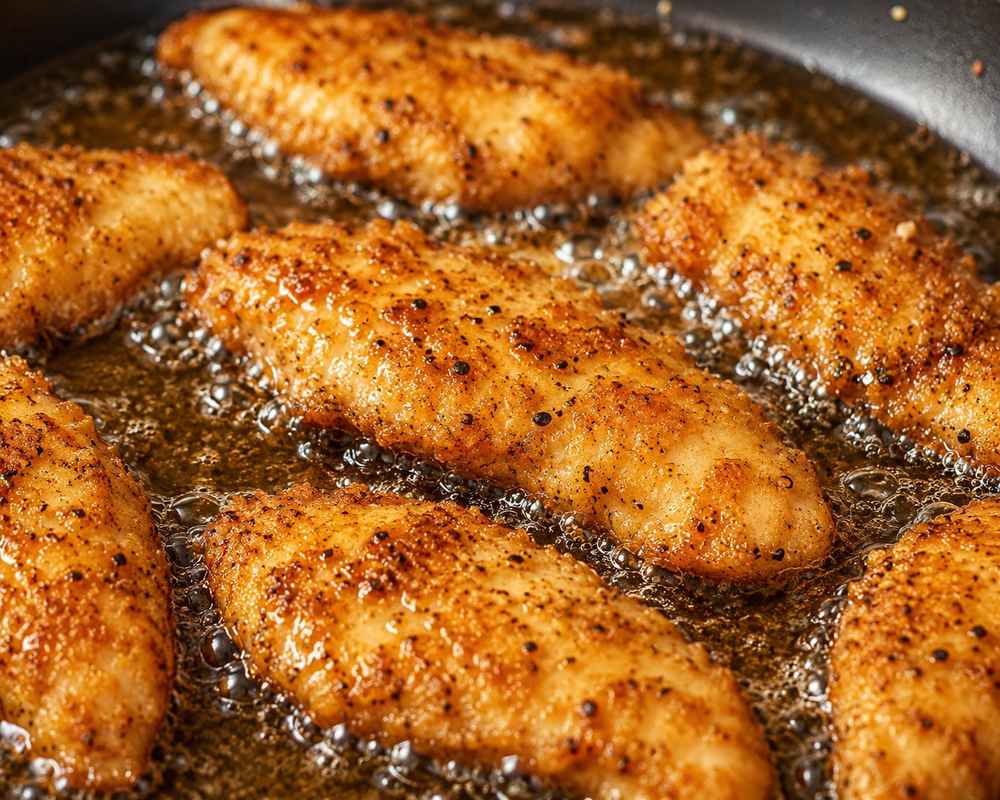
Add several chicken strips to the skillet in one layer.
Leave a little breathing room around each piece. Crowding the pan lowers the oil temperature and encourages steaming instead of crisping.
Cook the first side for approximately 3 to 4 minutes.
Once the bottom looks golden and releases easily from the skillet, turn the chicken.
Cook the second side for another 2 to 4 minutes, depending on thickness.
The chicken should reach an internal temperature of 165°F or 74°C at its thickest point.
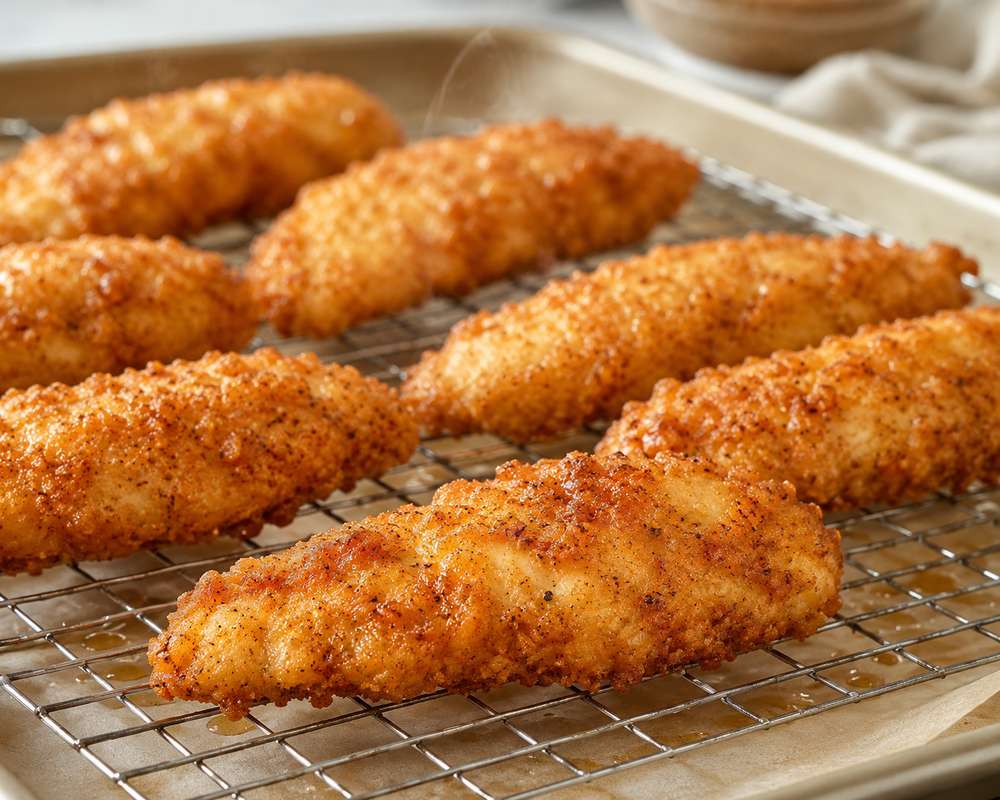
Transfer the cooked tenders to a clean wire rack.
Let the oil return to temperature before adding the next batch.
Step 6: Drain the Skillet Safely
Once all the chicken is cooked, turn off the heat.
Carefully transfer the frying oil to a heat-safe container. Never pour hot cooking oil down the sink.
Wipe the skillet with paper towels once it is safe to handle, leaving behind only a light film and a few browned bits.
Those browned bits can add flavor, but large burnt crumbs should be removed because they may make the glaze bitter.
You can also prepare the sauce in a separate clean skillet.
Step 7: Lightly Brown the Butter
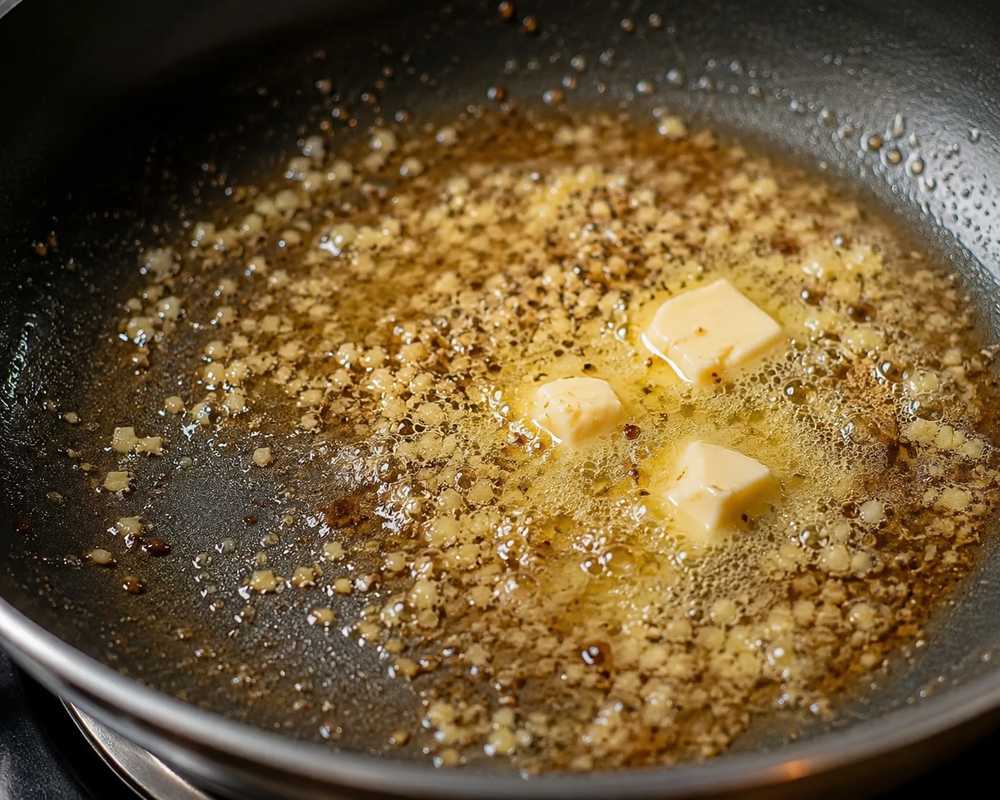
Return the skillet to medium-low heat.
Add the butter.
Let it melt and foam gently, swirling the pan occasionally.
Cook until you notice a few pale golden flecks at the bottom and the butter smells slightly nutty.
Do not push it to a dark brown color. The garlic still needs time to cook, and butter can move from toasted to burnt with remarkable enthusiasm.
Step 8: Add the Garlic
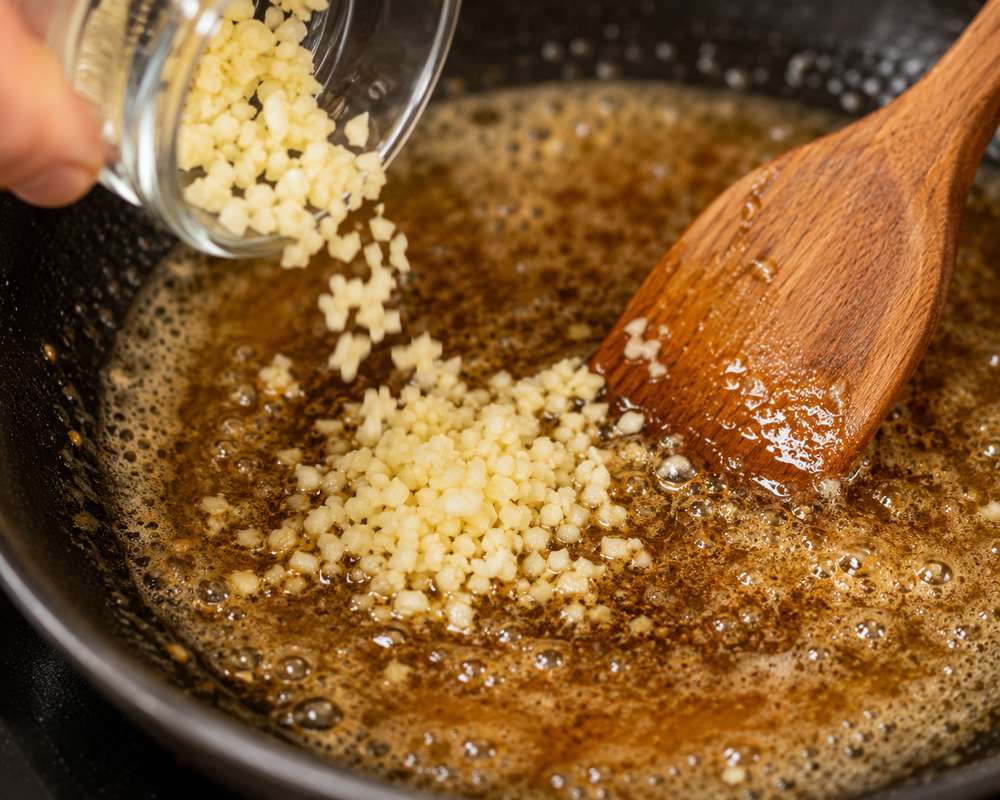
Reduce the heat to low.
Add the minced garlic.
Stir continuously for about 30 seconds, just until fragrant.
The garlic should remain pale.
If it turns dark brown, it may give the glaze a bitter edge.
Step 9: Build the Honey Glaze
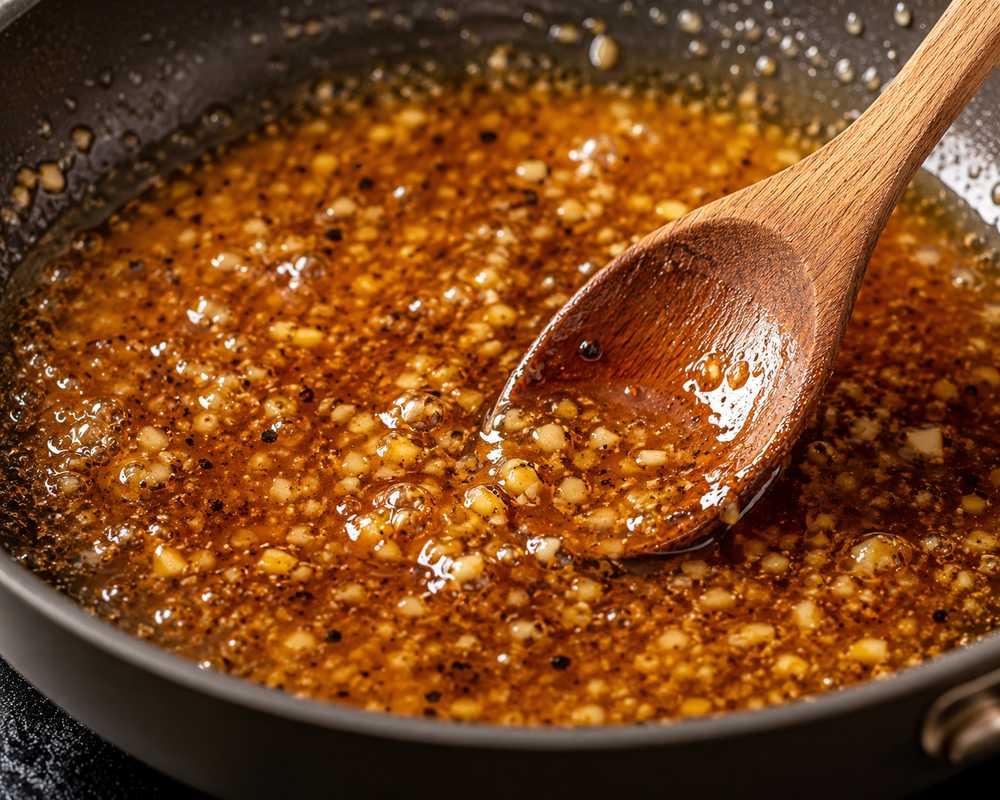
Add:
- Honey
- Soy sauce
- Lemon juice
- Chicken broth
- Mustard
- Smoked paprika
- Red pepper flakes
- Black pepper
Stir until smooth.
Allow the glaze to come to a gentle simmer.
Cook for approximately 1 minute, stirring regularly.
Keep the heat moderate. Honey contains natural sugars and can scorch when cooked too aggressively.
Step 10: Thicken the Sauce
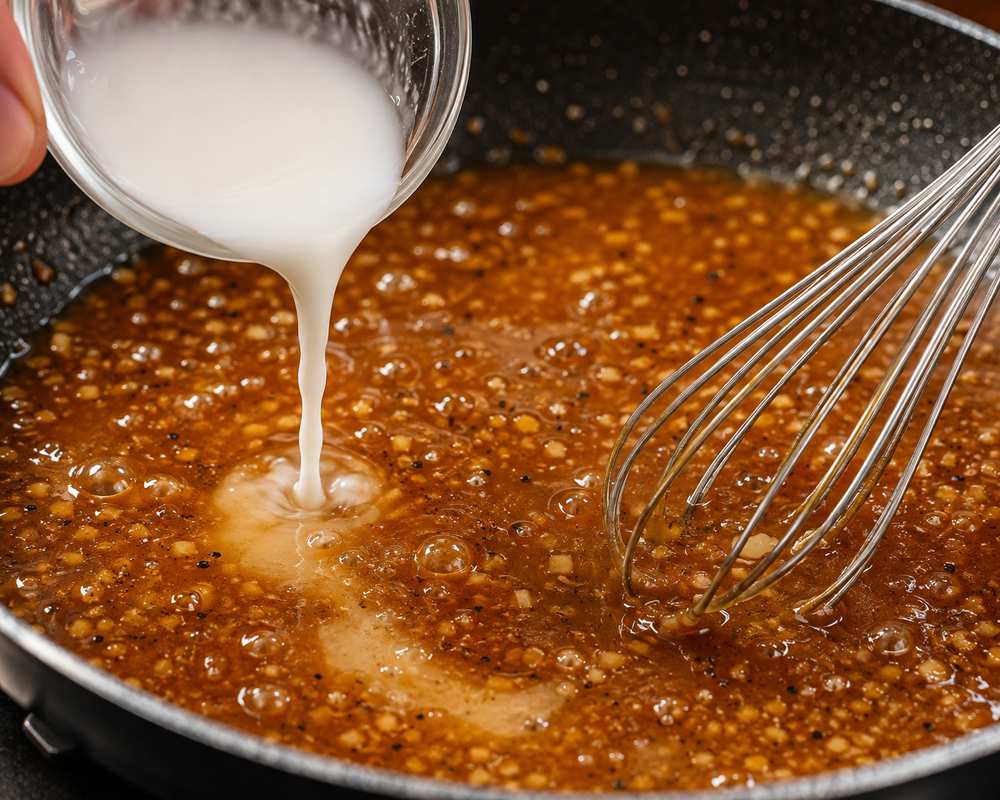
In a small bowl, stir together the cornstarch and cold water until no lumps remain.
Slowly pour the slurry into the simmering glaze while stirring.
Cook for another 30 to 60 seconds.
The sauce should become glossy and lightly thickened. It should coat the back of a spoon but still flow easily.
Keep in mind that it will continue to thicken as it cools.
When the sauce becomes too thick, add chicken broth or water 1 tablespoon at a time.
When it remains too thin, simmer it for another 20 to 30 seconds.
Step 11: Glaze the Chicken
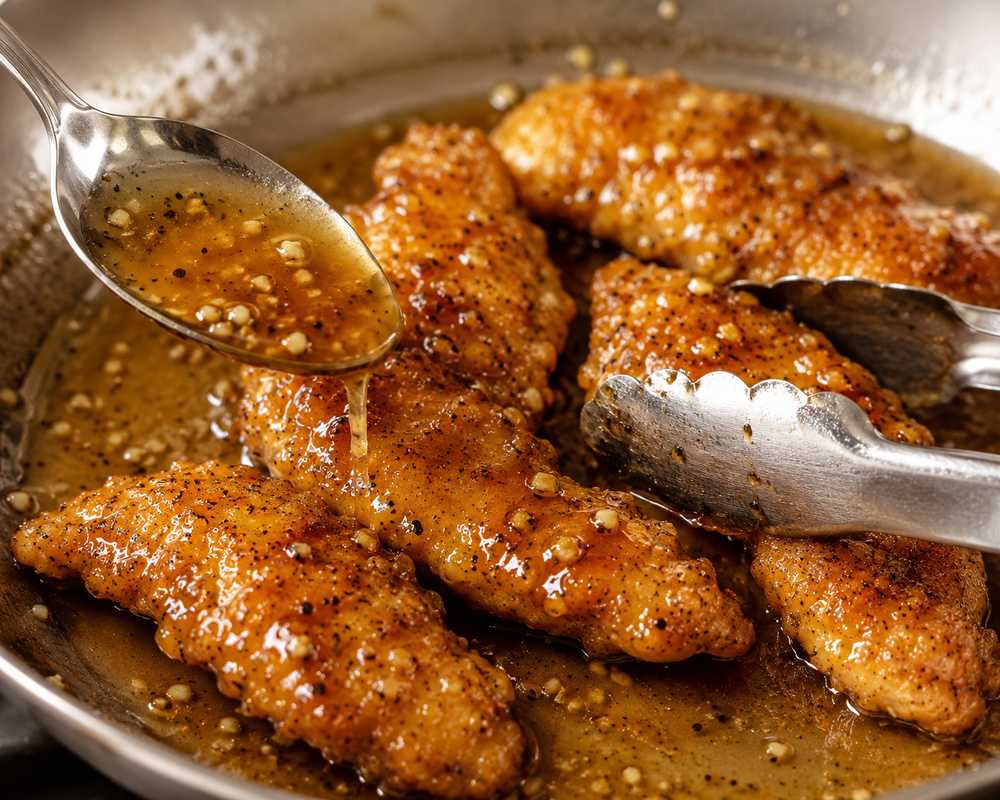
You have two good options here.
For the Crispiest Result
Arrange the chicken on a serving platter.
Brush or spoon the warm glaze over each piece.
This leaves more of the coating exposed and crisp.
For a Fully Sauced Result
Add the chicken to the skillet.
Turn each piece gently through the glaze for about 20 seconds.
Do not simmer the cooked chicken in the sauce. Prolonged cooking will soften the coating and may dry out the meat.
Step 12: Finish and Serve
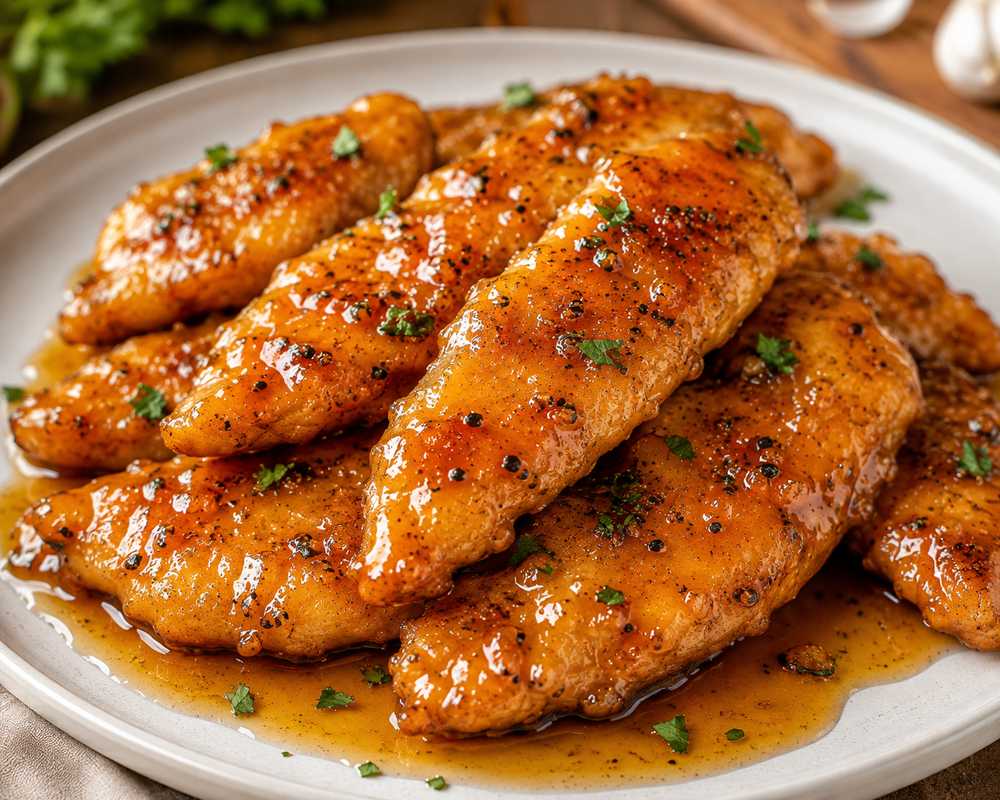
Transfer the chicken to a serving plate.
Spoon over any remaining glaze.
Finish with chopped parsley, cracked black pepper, and a small squeeze of lemon when you want extra brightness.
Serve immediately.
The coating will naturally soften as it sits beneath the sauce, so this is not the dish to make and then abandon on the counter while starting a 40-minute phone call.
Air-Fryer Method
Prepare and coat the chicken according to the main recipe.
Preheat the air fryer to 390°F or 200°C.
Spray the basket lightly with cooking oil.
Place the tenders in one layer, leaving space between them.
Spray the tops generously, especially anywhere dry flour remains visible.
Air-fry for 6 minutes.
Turn each piece and spray the second side.
Cook for another 5 to 7 minutes, or until golden and the centers reach 165°F or 74°C.
Prepare the glaze separately on the stove.
Brush it onto the chicken immediately before serving.
The air-fried coating will be slightly less evenly golden than the shallow-fried version, but it can still become crisp when the flour is properly coated with oil spray.
Oven Method
Preheat the oven to 425°F or 220°C.
Set a wire rack over a rimmed baking sheet and coat it with cooking spray.
Place the chicken strips on the rack.
Spray them generously with neutral oil.
Bake for 10 minutes.
Turn the chicken, spray any remaining dry areas, and bake for another 8 to 12 minutes.
Remove the chicken once it is cooked through and golden around the edges.
Brush with the freshly prepared glaze before serving.
Tips for the Best Chicken Strips
Do Not Use Wet Chicken
Patting the chicken dry before adding the marinade prevents excess water from thinning the seasoning.
Keep the Marinade Thin
A heavy yogurt coating can create thick, patchy breading.
You need only enough to lightly cover the chicken.
Press, Then Rest
Pressing the dry coating onto the chicken helps it attach.
Resting the coated chicken gives that attachment time to strengthen.
Cook in Batches
A crowded skillet loses heat quickly.
Smaller batches give the chicken better color and a crisper surface.
Turn Only Once When Possible
Moving the tenders repeatedly before the crust sets can tear the coating.
Wait until the first side releases easily.
Use Fresh Garlic Carefully
Fresh garlic tastes far better in this glaze than garlic powder alone, but it burns quickly.
Keep the heat low after adding it.
Do Not Over-Reduce the Sauce
The glaze thickens as it cools.
Stop cooking while it still looks slightly looser than your ideal final consistency.
Glaze at the Last Minute
Once sauce touches a crisp coating, the countdown begins.
Brush the chicken shortly before serving for the best texture.
How to Keep the Chicken Crisp
Completely crisp and fully sauced chicken are natural enemies. You can, however, negotiate a respectable peace treaty:
- Drain the chicken on a wire rack.
- Never cover hot fried chicken.
- Keep cooked batches in a low oven while finishing.
- Prepare the glaze only after all the chicken is cooked.
- Brush on a light layer rather than drowning the tenders.
- Serve additional sauce on the side.
- Sauce only the amount you plan to eat immediately.
Best Ways to Serve It
These chicken strips work with simple sides that can catch the extra glaze.
Serve them with:
- Jasmine rice
- Garlic rice
- Coconut rice
- Creamy mashed potatoes
- Roasted baby potatoes
- Buttered noodles
- French fries
- Roasted broccoli
- Steamed green beans
- Cucumber salad
- Coleslaw
- Corn on the cob
For an easy bowl, add rice, sliced cucumber, shredded carrots, steamed broccoli, chicken strips, parsley, and a spoonful of glaze.
Make It Mild or Spicy
Mild
Skip the cayenne and red pepper flakes.
Use regular paprika instead of smoked paprika for an even softer flavor.
Medium
Use ¼ teaspoon cayenne in the chicken and ¼ teaspoon red pepper flakes in the glaze.
Spicy
Use:
- ½ teaspoon cayenne in the chicken
- ½ teaspoon red pepper flakes
- 1 teaspoon chili sauce in the glaze
Less Sweet
Reduce the honey to ¼ cup.
Increase the chicken broth to ⅓ cup and add another teaspoon of lemon juice.
Extra Garlicky
Use 6 cloves of garlic.
Keep the cooking heat very low so the garlic softens without browning.
Ingredient Substitutions
Chicken Breast
Slice boneless chicken breasts lengthwise into strips of similar thickness.
Even pieces cook at roughly the same speed.
Boneless Chicken Thighs
Cut the thighs into wide strips.
They may need another minute or two of cooking depending on thickness.
No Rice Flour
Replace it with additional cornstarch or all-purpose flour.
Additional cornstarch creates a more delicate crust; additional flour creates a firmer one.
No Yogurt
Use 3 tablespoons of buttermilk.
Because buttermilk is thinner, let the excess drip well before coating.
No Soy Sauce
Replace it with:
- An additional pinch of salt
- 1 teaspoon lemon juice
- 1 tablespoon chicken broth
The glaze will taste lighter and less deeply savory.
No Mustard
Leave it out or add ½ teaspoon apple cider vinegar.
The mustard is not meant to dominate; it simply cuts through the sweetness.
Make-Ahead Instructions
The chicken can be seasoned up to 4 hours ahead and refrigerated.
The dry coating can be mixed a day in advance and kept in an airtight container.
The glaze can also be made earlier, but it will thicken as it cools. Warm it gently with a spoonful of broth before using.
For the best texture, coat and cook the chicken shortly before serving.
Do not store raw chicken inside leftover dry coating. Any mixture that touched raw chicken should be discarded.
How to Store Leftovers
Let the chicken cool briefly, then transfer it to an airtight container.
Refrigerate leftovers promptly and use them within 3 to 4 days.
Whenever possible, store the sauce separately from unsauced chicken.
That gives you a better chance of restoring some crispness during reheating.
How to Reheat
Air Fryer
Reheat at 350°F or 175°C for 4 to 6 minutes.
Brush with warm glaze afterward.
Oven
Place the chicken on a wire rack.
Heat at 375°F or 190°C for 8 to 12 minutes.
Skillet
Warm the chicken in a lightly oiled skillet over medium-low heat.
Turn occasionally until hot.
Microwave
Microwave in short intervals.
The chicken will warm, but the coating will be soft.
Reheated leftovers should reach 165°F or 74°C.
Frequently Asked Questions
Is this recipe very sweet?
It is sweet, but not dessert-level sweet.
Soy sauce, lemon, garlic, mustard, and black pepper keep the glaze balanced.
For a more savory version, reduce the honey to ¼ cup.
Why did my coating fall off?
Common causes include:
- The chicken was too wet
- The flour was not pressed onto the surface
- The coated chicken did not rest
- The oil was not hot enough
- The first side was turned before the crust formed
- The chicken was tossed too aggressively in the glaze
Why is my chicken greasy?
The frying oil was probably too cool, or too many pieces were added at once.
Allow the oil to return to temperature between batches.
Why did the glaze become hard or sticky?
It was likely cooked for too long.
Add warm chicken broth 1 tablespoon at a time and stir over low heat until it loosens.
Why did the glaze taste bitter?
The garlic or butter may have burned.
Use low heat and remove dark garlic before adding the remaining ingredients.
Can I use frozen chicken?
Yes, but thaw it fully in the refrigerator first.
Pat away all thawing moisture before seasoning.
Can I make bite-size pieces?
Yes.
Cut the chicken into 1½-inch pieces and follow the same process.
They will cook faster, so begin checking after 2 to 3 minutes per side.
Can I double the glaze?
Yes.
Double all glaze ingredients and prepare them in a wider saucepan.
Extra sauce is especially useful when serving the chicken with rice.
Can I skip frying?
Yes.
Use the air-fryer or oven method.
Both versions should still be glazed only after the chicken is cooked.
Leave a Reply