
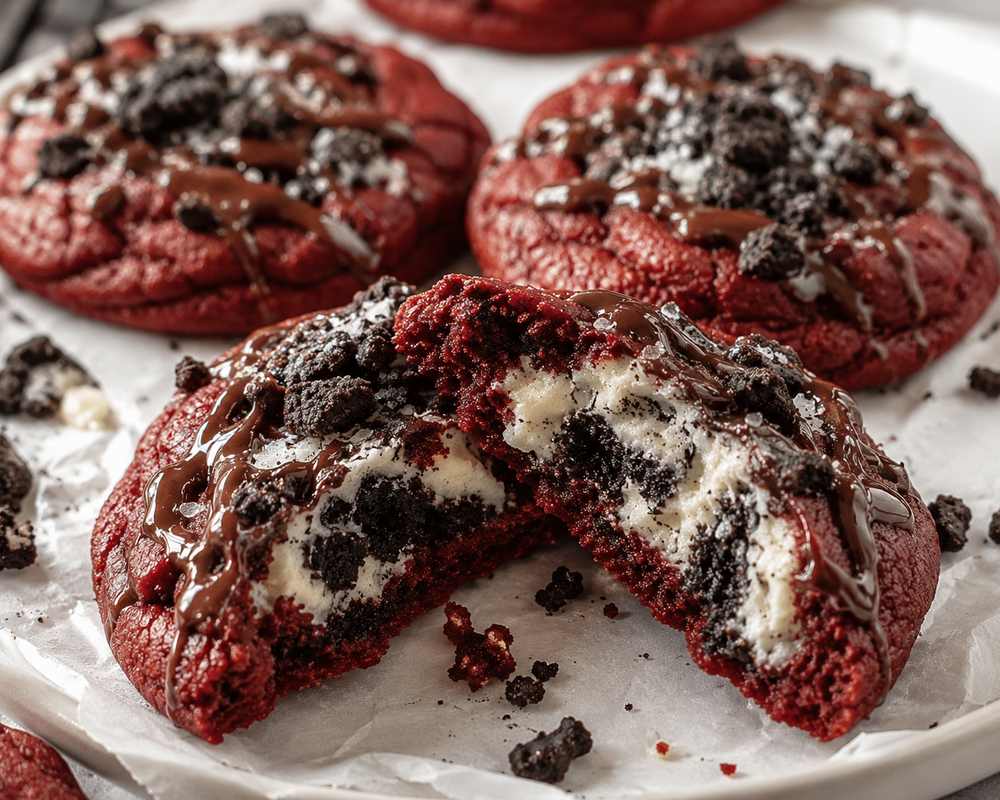
These cookies are less about making perfect circles and more about the moment you break one open.
The outside is a thick red velvet cookie with lightly crisp edges, natural cracks, pockets of chocolate, and pieces of chocolate sandwich cookie. Hidden inside is a pale cookies-and-cream cheesecake center that stays rich and creamy after baking.
The contrast is what makes them memorable. The cookie shell has a gentle cocoa flavor and a soft, chewy bite. The filling is cool and slightly tangy, while the cookie pieces add enough crunch to keep every bite interesting.
They look like something from a specialty bakery, but the process is manageable at home. The cheesecake mixture is divided and frozen first, then enclosed inside generous portions of red cookie dough. Chilling the assembled cookies before baking helps them stay tall and keeps the filling where it belongs.
A final drizzle of melted chocolate and a scattering of dark cookie crumbs make them dramatic without requiring complicated decoration.
This recipe contains no alcohol, pork, gelatin, or intentionally haram ingredients. Use halal-certified chocolate, food coloring, cream cheese, and sandwich cookies where certification is available.
Ingredients You’ll Need
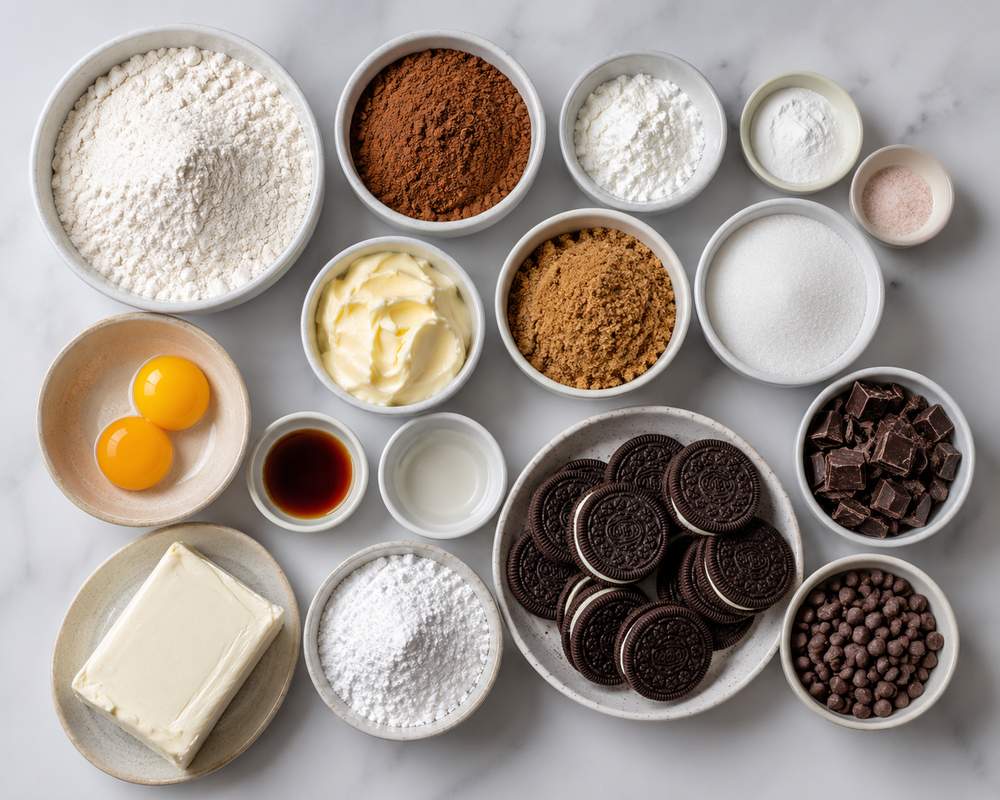
Block Cream Cheese
Use full-fat cream cheese sold as a firm block. Spreadable cream cheese from a tub usually contains more moisture and can produce a loose filling.
Chocolate Sandwich Cookies
Use halal-certified chocolate sandwich cookies with a vanilla-style center. Oreo cookies can be used when the ingredients and certification available in your country meet your requirements.
The cookies are used three ways:
- Finely crushed inside the cheesecake center
- Roughly chopped inside the red velvet dough
- Crumbled over the finished cookies
Cocoa Powder
Natural unsweetened cocoa gives the dough a recognizable red velvet flavor without making it taste like a dark chocolate cookie.
Red Gel Coloring
Concentrated gel coloring produces a strong red shade without introducing too much extra liquid.
Check the label for halal certification and avoid coloring made with carmine, cochineal, uncertain animal derivatives, or alcohol-based carriers.
Chocolate
Use halal-certified semisweet or dark chocolate chunks. A slightly darker chocolate balances the sweet cheesecake center particularly well.
Vanilla
Choose alcohol-free vanilla flavoring, vanilla powder, or halal-certified vanilla.
Ingredients
Cookies-and-Cream Cheesecake Centers
- 6 ounces or 170 grams full-fat block cream cheese, softened
- ⅓ cup or 40 grams powdered sugar
- ½ teaspoon alcohol-free vanilla flavoring
- Small pinch of fine salt
- 5 halal-certified chocolate sandwich cookies, finely crushed
Red Velvet Cookie Dough
- 2¼ cups or 280 grams all-purpose flour
- 3 tablespoons or 22 grams natural unsweetened cocoa powder
- 1 tablespoon or 10 grams cornstarch
- ¾ teaspoon baking soda
- ½ teaspoon fine salt
- ¾ cup or 170 grams unsalted butter, softened but not greasy
- ¾ cup or 150 grams packed light brown sugar
- ⅓ cup or 70 grams granulated sugar
- 1 large egg, at room temperature
- 1 large egg yolk, at room temperature
- 1 teaspoon alcohol-free vanilla flavoring
- 1 teaspoon white vinegar
- 2 to 3 teaspoons concentrated halal red gel coloring
- 6 chocolate sandwich cookies, broken into small pieces
- ½ cup or 90 grams halal semisweet chocolate chunks
Chocolate Finish
- 3½ ounces or 100 grams halal semisweet chocolate
- 2 chocolate sandwich cookies, crushed
- A few grains of flaky salt, optional
How to Make Red Velvet Oreo Cheesecake Cookies
Step 1: Mix the Cheesecake Center
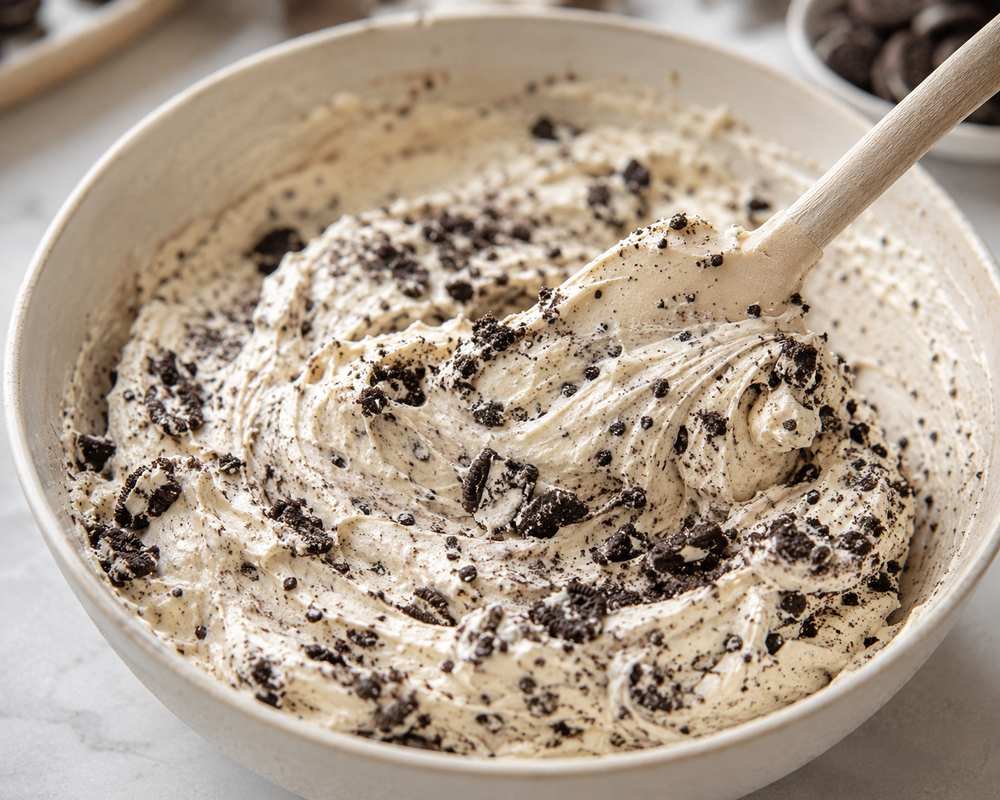
Place the softened cream cheese in a medium bowl.
Add the powdered sugar, alcohol-free vanilla, and salt. Stir until the mixture looks smooth and no dry sugar remains around the sides of the bowl.
Fold in the finely crushed chocolate sandwich cookies.
The mixture should look thick and pale with dark cookie speckles throughout. Avoid beating it for too long, since excessive mixing can make the filling softer.
Step 2: Portion and Freeze the Filling
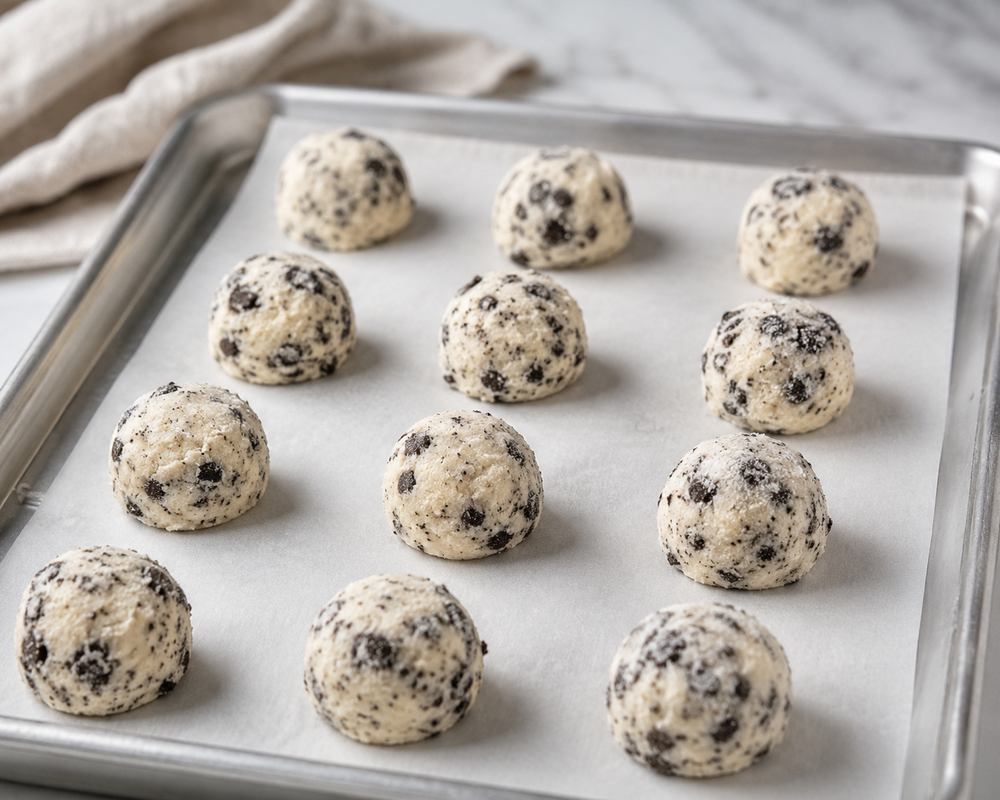
Line a small tray with parchment paper.
Divide the cheesecake mixture into 12 portions. Each portion should contain roughly one rounded tablespoon.
Use two spoons or a small cookie scoop to form compact mounds. They do not have to be perfectly round.
Freeze for 40 to 50 minutes, until firm enough to lift without sticking heavily to your fingers.
Keep the filling in the freezer until the dough is ready.
Step 3: Prepare the Dry Mixture
Place the flour, cocoa powder, cornstarch, baking soda, and salt in a separate bowl.
Whisk thoroughly, paying particular attention to any lumps of cocoa or baking soda.
Set the mixture aside.
Step 4: Beat the Butter and Sugars
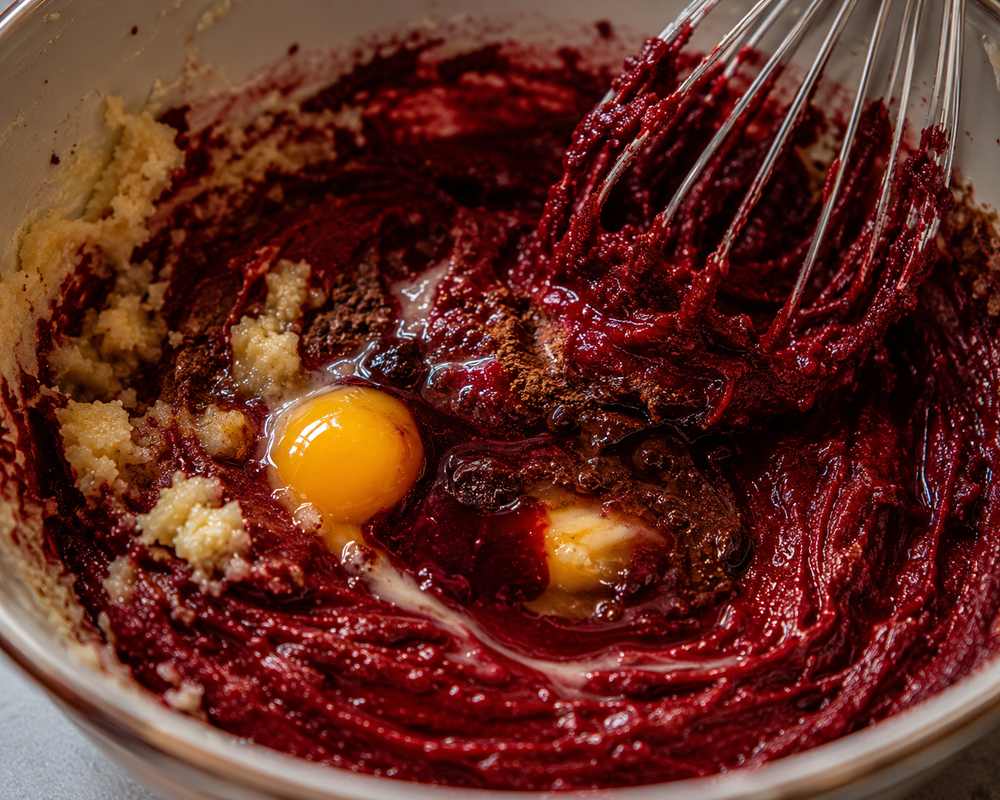
Add the softened butter, brown sugar, and granulated sugar to a large mixing bowl.
Beat at medium speed for approximately two minutes.
The mixture should become creamy and evenly blended, but it does not need to become extremely pale or fluffy.
Scrape the bowl carefully, including the bottom where unmixed butter often collects.
Step 5: Create the Red Velvet Base
Add the whole egg and mix until absorbed.
Add the egg yolk, alcohol-free vanilla, vinegar, and two teaspoons of red gel coloring.
Mix again until the color looks even.
Assess the shade before adding more coloring. The cocoa will deepen it slightly, and the cookies will darken further in the oven.
Add only enough additional gel to achieve a rich red color.
Step 6: Finish the Dough
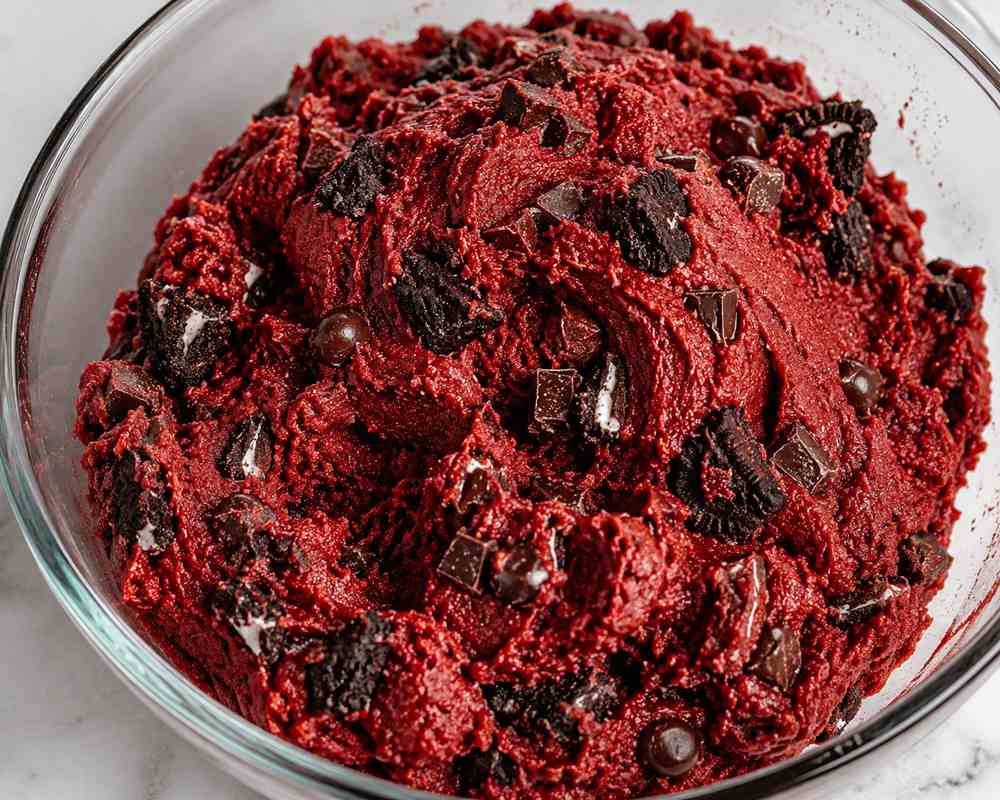
Add the dry mixture in two stages.
Mix slowly after each addition, stopping when only a few streaks of flour remain.
Add the chopped sandwich cookies and chocolate chunks. Fold by hand until they are spread through the dough.
The dough should feel thick and soft but should not stick heavily to clean fingers.
Cover and refrigerate it for 20 minutes if it feels unusually warm or loose.
Step 7: Build the Stuffed Cookies
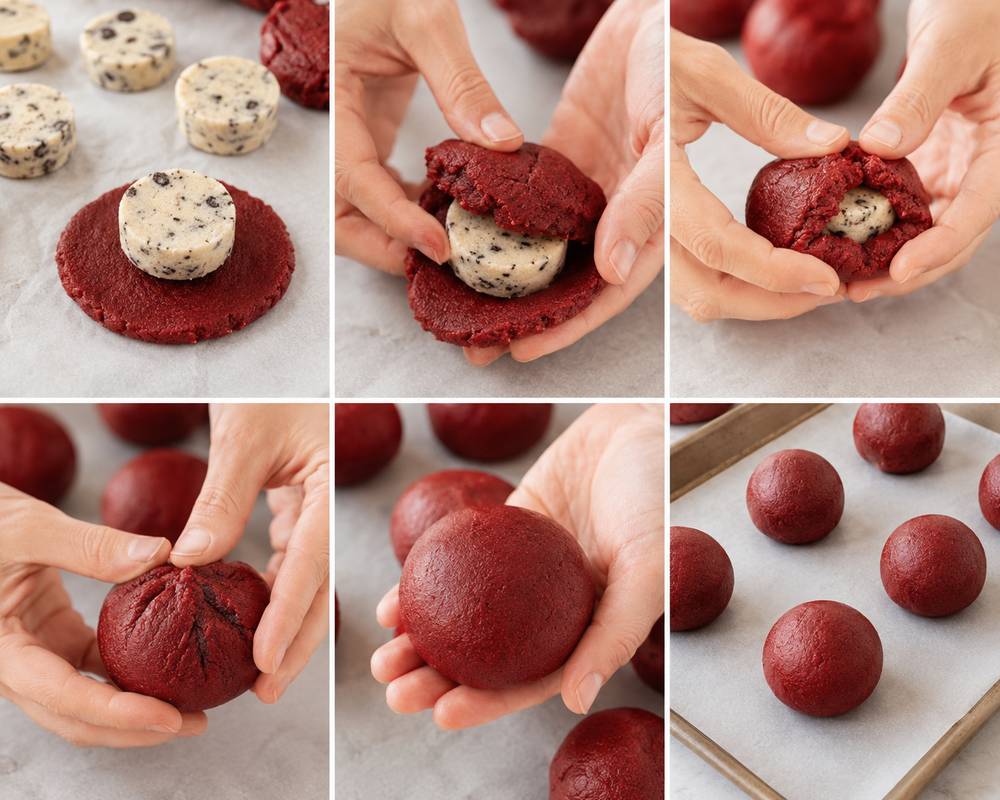
Divide the dough into 12 equal portions. For consistent cookies, each portion should weigh approximately 75 grams.
Take one portion and split it into two pieces, making one slightly larger than the other.
Flatten the larger piece into a thick disc. Place one frozen cheesecake mound in the center.
Flatten the smaller dough piece and place it over the filling.
Bring the lower edges upward and pinch them to the top piece. Gently roll the dough between your palms until the seam disappears.
Inspect the entire surface before moving to the next cookie. No cream cheese should be visible.
Return unused filling portions to the freezer while working.
Step 8: Chill the Filled Dough
Place the filled dough balls on a parchment-lined tray.
Refrigerate for 30 to 40 minutes.
Near the end of the chilling time, heat the oven to 350°F or 175°C.
Line two large baking trays with parchment paper.
Step 9: Bake in Batches
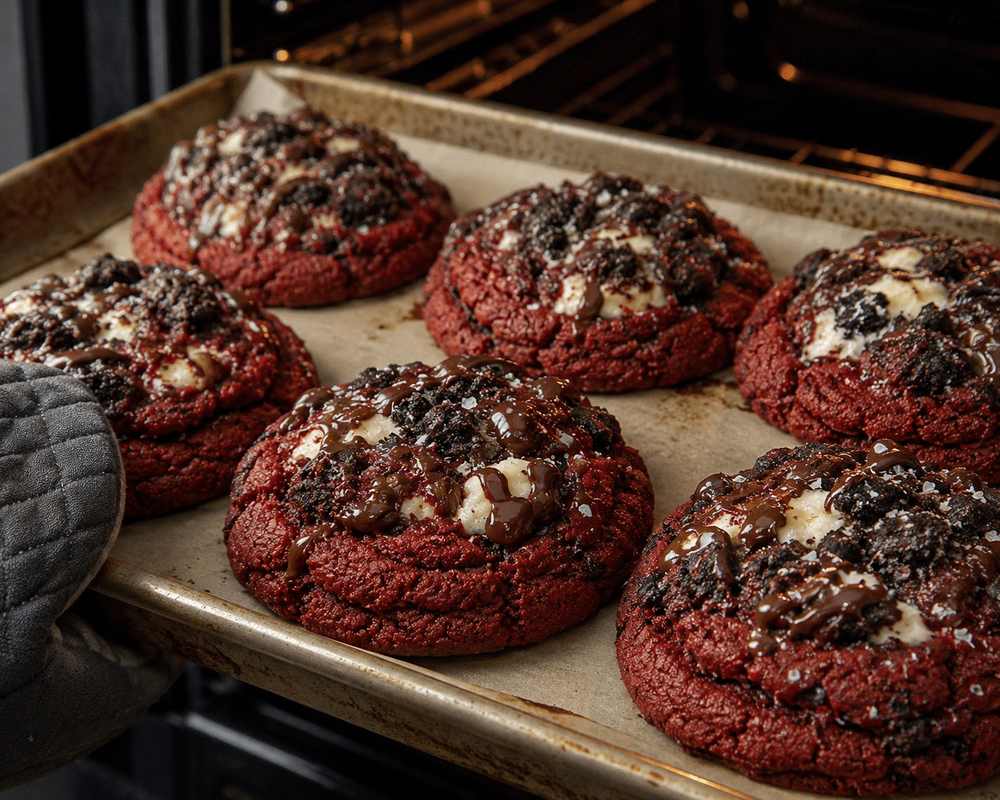
Arrange six chilled dough balls on each tray, leaving generous space between them.
Do not press them flat.
Bake one tray at a time for approximately 12 to 14 minutes.
The cookies are ready when the outer edges have set, the tops show natural cracks, and the centers still look slightly puffed.
Instead of waiting for the centers to become firm, remove the tray once the raw shine has disappeared from the outer dough. The cookies will continue settling on the hot tray.
Step 10: Shape and Cool
Leave the cookies untouched for two minutes.
For a rounder bakery-style shape, place a large circular cutter or drinking glass around each warm cookie and move it gently in a circular motion.
Leave the cookies on the tray for another 10 to 12 minutes.
Transfer them carefully to a cooling rack.
Do not break one open while it is piping hot. The filling and chocolate need time to settle before the true texture becomes visible.
Step 11: Add the Chocolate Finish
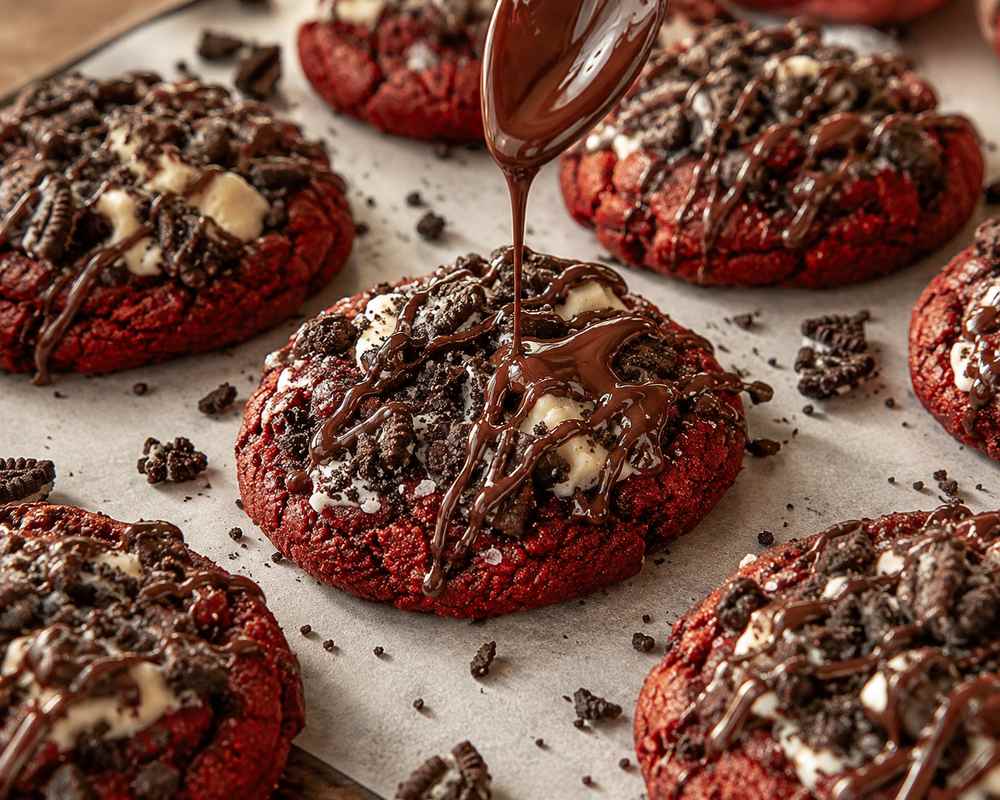
Melt the chocolate gently in a heat-safe bowl.
Use a spoon or small piping bag to drizzle it over the completely cooled cookies.
Sprinkle the crushed sandwich-cookie crumbs over the chocolate before it sets.
A few grains of flaky salt can be added to each cookie for contrast, but this is optional.
Allow the chocolate to firm before storing the cookies.
The Texture to Expect
Once cooled, the cookie shell should have lightly structured edges with a soft, dense middle.
The filling should be creamy but firm enough to remain inside the cookie when it is cut.
You should see visible pieces of chocolate sandwich cookie in both the shell and the cheesecake center.
These are intentionally large cookies. One cookie is rich enough to serve as a full dessert.
How to Prevent Filling Leaks
Filling usually escapes for one of four reasons:
- The cheesecake portions were too soft.
- The dough had a visible seam.
- The layer beneath the filling was too thin.
- The shaped cookies became warm before baking.
Keep the filling frozen, inspect every dough ball, and return the assembled cookies to the refrigerator before they go into the oven.
A small spot of filling appearing through one cookie does not ruin the batch, but proper chilling makes leaks far less likely.
Variations
White Chocolate Cookies-and-Cream Version
Replace the semisweet chocolate chunks and drizzle with halal-certified white chocolate.
The result will be sweeter and closer to the flavor of cream cheese frosting.
Extra-Dark Chocolate Version
Use dark chocolate chunks containing approximately 60% cocoa.
This creates a less sweet finish and makes the cream cheese center stand out more.
Cookie-Crumb Coating
Roll the upper half of each filled dough ball in coarse sandwich-cookie crumbs before chilling.
The cookies will bake with a rougher, more dramatic surface.
Smaller Stuffed Cookies
Divide the filling and dough into 16 portions.
Reduce the baking time and begin checking at approximately 10 minutes.
Naturally Colored Version
Leave out the red gel.
The cookies will be cocoa-brown rather than red, but the cheesecake center and cookies-and-cream flavor will remain unchanged.
Make-Ahead Instructions
The cheesecake portions can be prepared and frozen for up to three days.
The cookie dough can be mixed and refrigerated in a covered container for up to 24 hours.
Filled, unbaked dough balls can be frozen on a tray. Once firm, place them in a freezer-safe container with parchment between the layers.
Bake frozen portions directly from the freezer, adding a few extra minutes as needed.
Freezing the Baked Cookies
Cool the cookies completely before freezing.
For the neatest appearance, freeze them before adding the chocolate decoration.
Wrap the cookies individually or separate them with parchment in a freezer-safe container.
Thaw them in the refrigerator, then decorate after they have returned close to room temperature.
Frequently Asked Questions
Can I use Oreo cookies?
Yes, when the Oreo product sold in your region meets your halal requirements. Ingredient formulas and certifications can vary by country.
Can I use cream cheese spread?
Block-style cream cheese is the better choice. Spreadable cream cheese can make the center too soft.
Is the vinegar noticeable?
No. The small amount supports the familiar red velvet flavor without making the cookies taste sour.
Do I need both an egg and an egg yolk?
The extra yolk gives the dough more richness and a softer bite. Omitting it will produce a slightly firmer cookie.
Can I make them without chocolate chips?
Yes. Replace the chips with additional chopped sandwich cookies or leave them out.
Can I skip the chocolate drizzle?
Yes. The cookies are complete without it. Press a few cookie crumbs onto the warm tops for a simpler finish.
Why must the cookies be refrigerated?
The center contains cream cheese, so refrigeration is the safer storage choice.
How large are these cookies?
This recipe makes 12 generously sized bakery-style cookies. Each one is intended to be a substantial dessert portion.
Leave a Reply